Translate

Friday, March 30, 2012

Day #9- Creative Chemistry 101


And here is today's homework which catches me up. Yeah!!! I have tons of Perfect Pearls but just haven't been using them in some long. Kind of a fun play-day here. I am anxious to see what tomorrow's class brings.

Thursday, March 29, 2012

Day #8- Creative Chemistry 101

I absolutely LOVE the effect on the sticky-back canvas!!! It's my favorite so far! Enjoyed all three of these and will use these over and over again. I think I need a


thicker coat of rock candy on the last one, but they still turned out pretty good.

Day #7- Creative Chemistry 101


I love the look of embossing and that is what really lured me into this addition of paper crafting in the first place, so these were great for me. Rusty enamel is a favorite of mine, but I really enjoyed doing the other two as well. Should have used a different color for the first one than red, but I wanted to try out that stamp.


Day #6-Creative Chemistry 101

i decided to just try out my Marvy markers for this one instead of waiting until my Distress markers arrive. My results are no where near what Tim got, but I will do it again after I get the real deal. LOL I gotta say, that specialty paper is the BOMB! Wow, what a difference.


Saturday, March 24, 2012

Creative Chemistry- day #5

As my last post said, I got busy today and got caught up. Here are my attempts at Day 5's lessons.I really liked the Stained Kraft Resist, but I wish I had chosen a stamp that was more bold. My owl is kind of lost but the background is really cool.On the second one, stamping with stains, I had some problems with my tag kind of falling apart.. I think I sprayed too much water on it. I ended up flipping it over and using the other side as the stains went through, so it worked very nicely. Tag 3, the Marbled Stains, was a challenge as well, but after it didn't work very well, I decided to wet my tag first and then try again and it worked very well. I made up a few of these to use later. I love this one and am glad I can finally do something with my stains.


Creative Chemistry 101- Day #4


I finally got down to business today after work and got day 4 and 5 done and am all caught up again until Monday. I really enjoyed the water-coloring with re-inker technique. I thought I wouldn't like it because it would be putsy, but I really loved it. My grand-daughter was here and she said she liked it too! My second tag with the layered misting, was not too great but I need practice with the sprays. I am awful at them!As for the custom stamp pad, I tried it and was kind of successful, but I only had the cut and dry foam, not the felt, so will have to try again after I get some of that ordered and it arrives. I loved Tim's example, so will keep trying.


Thursday, March 22, 2012

Day #3, Creative Chemistry 101


on day 3, we used different inks for different effects. i am showing my samples of Alcohol Ink Agate, Archival Resist, and Stamping with Reflections Techniques. I have always loved alcohol ink agate, but the archival resist, who knew!!! Love this! I also had not touched my reflections stamps since the twelve days tag we used it on, so this was a nice refresher. Blogger is loading photos so slowly, I hope I can get all of these to work, will have to do them in between errands as this is my only short work-day this week and I have so many things to do and when I am caught up, will sit down and start today's lessons and then make mine. Wish me luck on getting it all done while the sun is still shining.


Creative Chemistry 101- Day #2


There were no projects on the first day, so am showing here my attempts at Day #2's lessons. The first tag was the Spritz and Flick technique, the second one is Brushless Watercolor, and the third is Wrinkle-free Distress. All three of mine came out pretty good. On my brushless watercolor, I forgot to use my hand to shield when I spritzed my torn edge so got a bit of bleeding on my flower stems, but I kind of liked it that way so didn't redo it. Loving this class! If you aren't taking it, go on over to Tim Holtz's blog and get yourself enrolled.


Monday, March 19, 2012

Where In The World is your Vagabond?

Here is a picture I had my granddaughter take of me and my Vagabond, "Vincenzo". I tried over and over to take it myself, but my arms aren't long enough to get enough of us in the shot. What a fun contest! My Vagabond lives with me in Black River F

alls, WI. I get my mail at:
Kathy Eddy
333 Clifton St.
Black River Falls, WI. 54615

Friday, March 16, 2012

Military Dedication

There is a place a few miles from here where they built a dedication to our heroes and all the military. It is near Neillsville, Wi. and is called The Highground. Last summer, you could purchase stones to be laid in honor of your family members who are/were servicemen and women. Here is a layout I completed today to give my father-in-law for his birthday this year in memory of this event. I have a frame for it, but it was glaring with the glass, so took the picture at a slight angle and out of the frame. I am also entering it in the OWSE challenge this month for a manly layout. It makes me want to do a few layouts now. It went so smoothly and easily came together. I hope he likes it.

Simon Says Stamp and Show- Anything Goes

This week over at SSSS, they are having an Anything Goes challenge. I decided to use the card I made for my baby girl, Savanna's 21st birthday tomorrow, St. Patrick's Day as my entry. I always make her an Irish card, so this year I did something different as I was inspired by visiting another blog. You can see it here at Recovering Stampoholic blog. I love the results I got using plain lod white card-

stock. After I liked the background, I die-cut the fancy label from blue and did the random embossing on that as well, then die-cut the numbers 21 out of recycled chipboard from work and painted with a black dabber. I cut a piece of tulle and tied it into a knot and hot glued the kno down onto the background and added pop-dots above and below it for the label to rest on. I made the rose and small flower using Tim's tattered florals die and Kraft Glassine paper. Love it! Die-cut a flourish and layered it all together. I love it and I know she will too.

Grungy Monday-#39

Running out of time for this week's challenge over on Linda's blog is to make Tim's alcohol ink plaid into a piece. This contest is sponsored by the wonder SimonSaysStamps. I needed a birthday card for my father-in-law, so went with a St. Patrick's day theme on my card. I am also using it for the green challenge over at Inspiration Emporium. Good thing we have these challenges or I would get nothing done at all. Used lots of greens in alcohol inks and a little black. I then used some recycled chipboard and also the packaging clear plastic from a die for my shamrocks. I painted the chipboard green with a dabber and then embossed the cler packaging and colored the high spots with a copic marker for contrast and layered with glossy accents, then pop-dotted off of card front, added the ribbon and layered it all together.

Tuesday, March 13, 2012

Twelve Tags of 2012- March

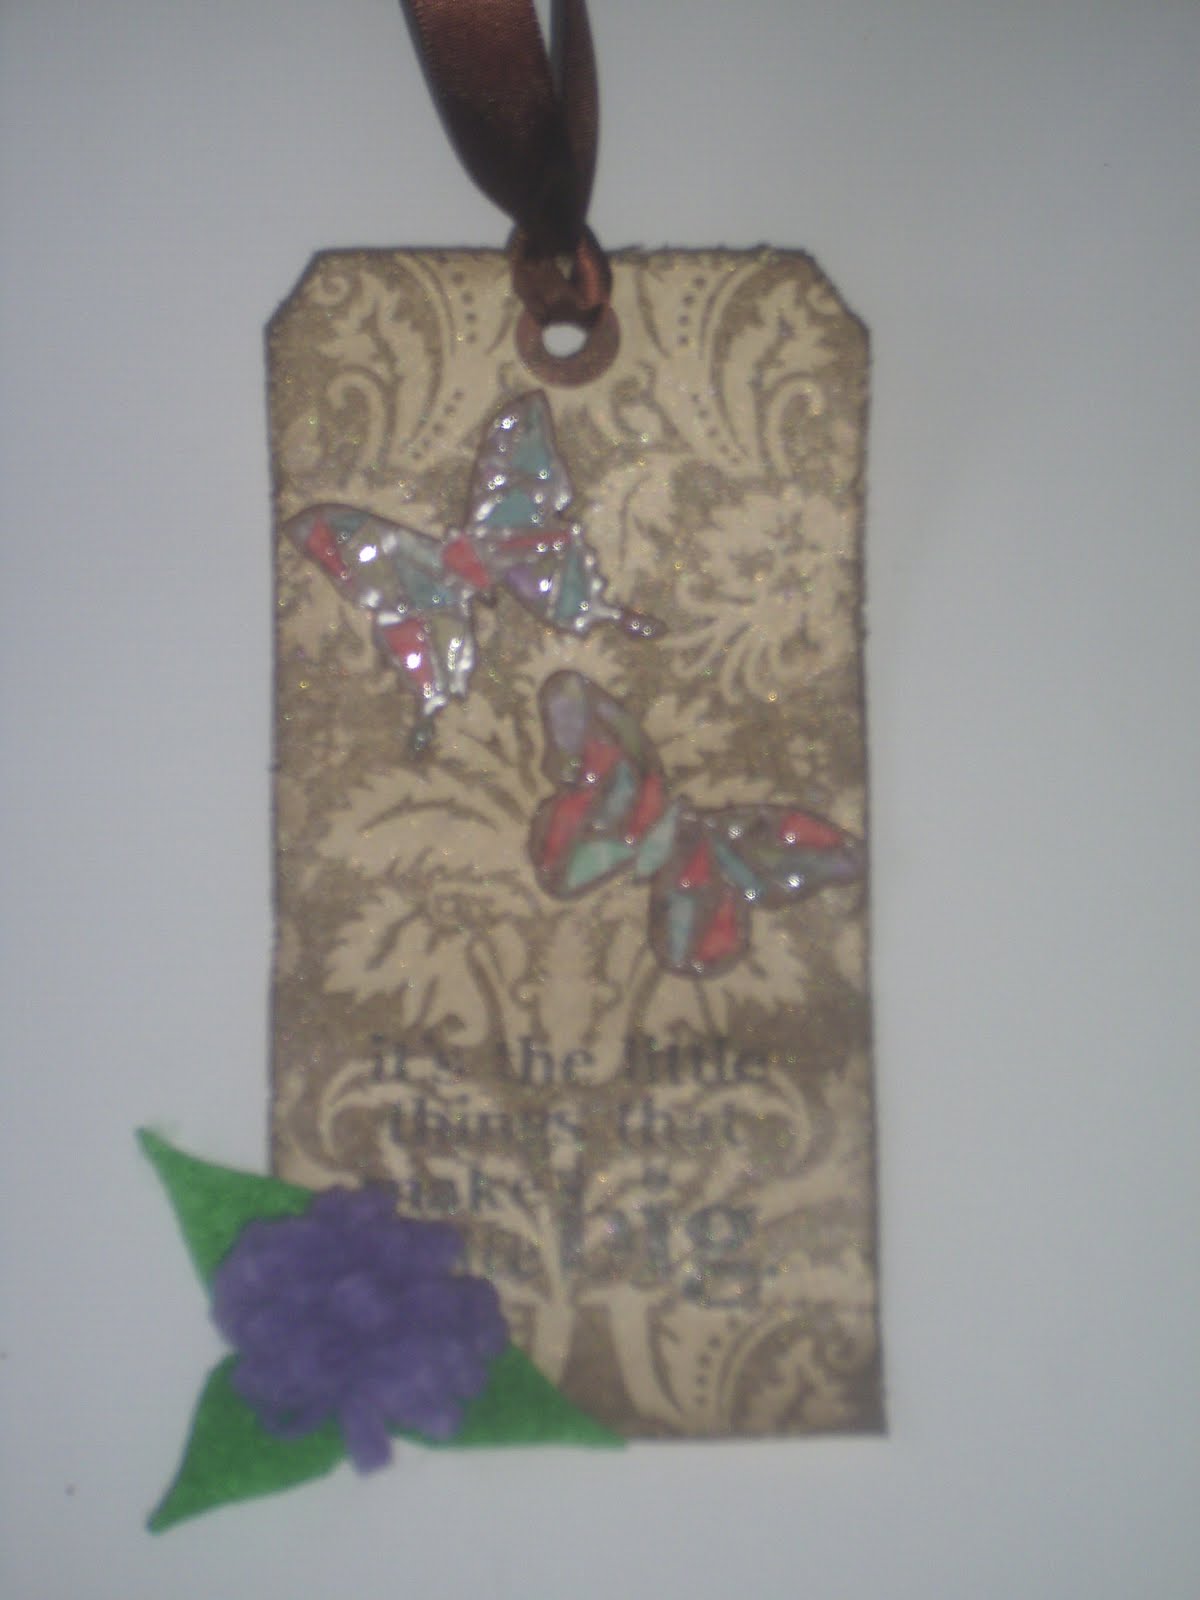
Tim had a wonderful spring tag for us for this month's challenge. It's on his blog, check it out. Well, I had to do some improvising on this one, but that's a good thing. Didn't have the wood-grain stamp but do have another one from another company, but I wanted a softer, more feminine background for mine so used this Hero Arts one. On the first one I made, I used White Pearl embossing powder but it went kind of brown-gray like the chipboard I used for my die-cut butterflies. On the second one, I used black powder so they would show up better and I love the difference it made. I didn't have the one Tim used and don't think I would use it again. I am going to try to use what I have this year instead of buying every product I see used. We'll see how far I get with this. LOL I also used felt to make my flower and leaves. I die cut the leaves, but the flowers, I cut a strip a little more than an inch wide on the edge of the piece of felt. I then cut it in half so about 4 1/4 " I guess. Put a strip of narrow red-liner tape on one edge and folded in half, lengthwise. Then just cut narrow snips from the fold in towards the taped edge, not to the edge. Then dab a little hot glue on the end and begin rolling iot into itself, adding glue as you go to form the flower. I bought a die like this a while back but am limitted to one size, this waty I can create my own, any size I want. Looks great with blue-jeans and other fabric scraps.